Welcome to Relayzo! This guide will walk you through the installation process for your email marketing application. Please follow the steps below carefully. If you’re not familiar with technical terms, don’t worry—this guide is designed to make the process as simple as possible.
Before starting, ensure that your hosting environment meets the following requirements:
Transfer all files from the Install folder to the root directory of your domain. The root directory is where your website’s files are stored. If you’re using a control panel like cPanel or FTP software, you can simply drag and drop the files into the directory.
- If your root directory is www/public_html/relayzo, then the domain path should be www/public_html/relayzo/public, the index.php file will be located within the public folder.
Open your web browser and go to the installation page by entering the following URL:
https://yourdomain.com/install/setup.php
For example, if your domain is https://example.com, navigate to:
https://example.com/install/setup.php
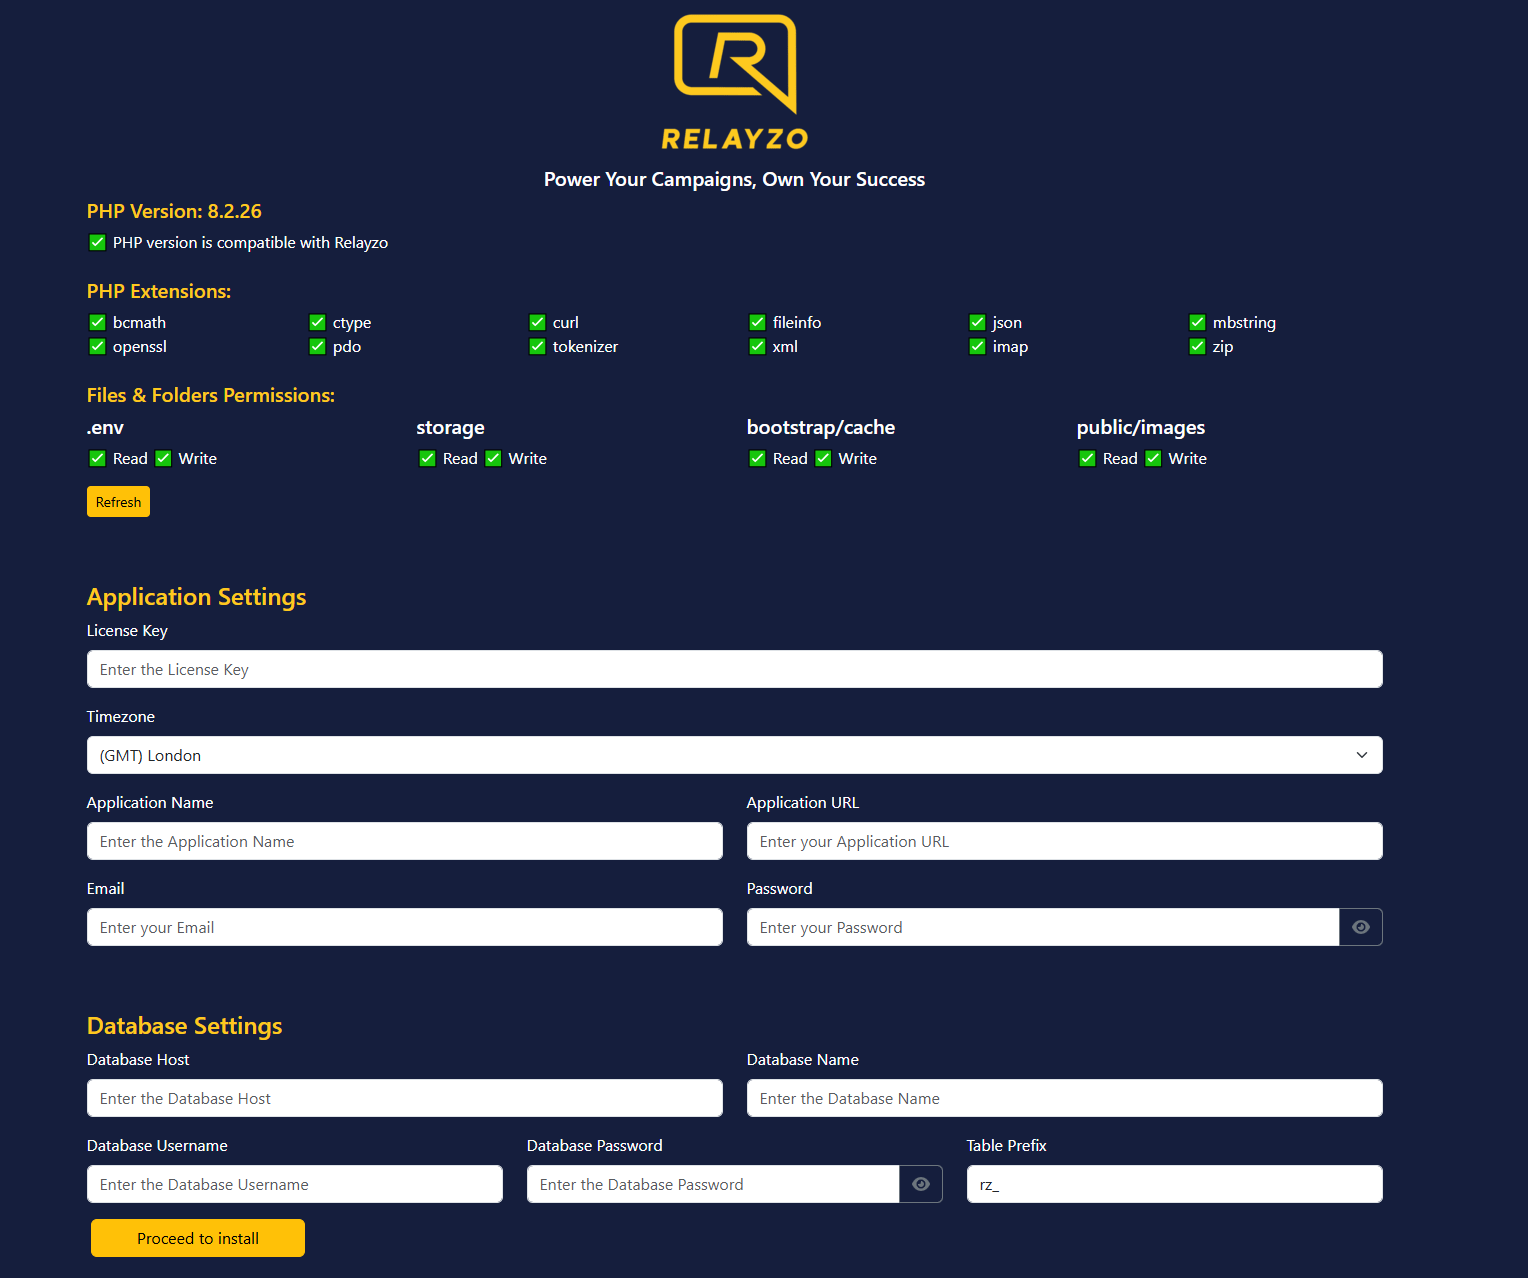
You need to ensure that certain files and folders have the correct permissions to allow the application to save data and function properly. Set the following files and directories to allow writing:
.envstoragebootstrap/cachepublic/imagesNote: If you’re unsure how to do this, follow these instructions:
      # Navigate to your Relayzo root directory
      cd /path/to/your/relayzo

      # Set write permissions for the .env file
      chmod 777 .env

      # Set recursive write permissions for the storage, bootstrap/cache, and public/images directories
      chmod -R 777 storage bootstrap/cache public/images
The chmod -R 777 The chmod -R 777 command provides read, write, and execute permissions. The -R flag ensures the change is applied recursively to all files and subdirectories inside the specified directories.
If you’re still unsure about how to set the permissions or run these commands, contact your hosting provider or refer to their documentation for setting file permissions.
During the installation process, the setup wizard will ask for important information. Gather the following details before starting:
https://example.com).localhostrz_Once you’ve entered all the required details, click the Proceed to Install button. The installation process will begin and should take about 2–3 minutes. Please avoid closing the browser or navigating away during this time.
After the installation is completed, you will need to configure cron jobs. These are scheduled tasks that automate essential processes for the application. Detailed instructions will be provided after installation.
Congratulations! Your application is now installed and ready to use. Log in with the admin email and password you set up to start exploring Relayzo’s features.
If you have any questions or run into any issues, don’t hesitate to reach out to our support team at team@relayzo.com for prompt assistance.